In my previous post you learnt about ListView and ListBox controls used in XAML.
In this post you will learn to:
Part 1
- Progressively build a ListView Control
- Place ListViewItems inside a ListView's ItemTemplate
- You will place three named ListView items
Part 2
- You will write code to change the properties of items you placed.
At first, you launch Visual Studio 2017 Community and create a blank Universal Windows Platform project using C# and provide the name to the project (Project JListView).
JlistView_0.png
Here you choose the target and min versions of Windows 10
JlistView_1.png
Add a ListView as shown between the 'Grid' as shown using intellisense.
JlistView_2.png
An empty ListView control is added to the XAML with some default border over the Desktop as shown.
JlistView_3.png
Now we place an ItemTemplate of the ListView by choosing from a drop-down list.
JlistView_4.png
Visual Studio is not happy as this template cannot be empty. We will add a DataTemplate inside the ItemTemplate, again using intellisense.
JlistView_5.png
Choose to place a DataTemplate.
JlistView_6.png
DataTemplate is placed and there is no red wiggly line for ItemTemplate like before.
JlistView_7.png
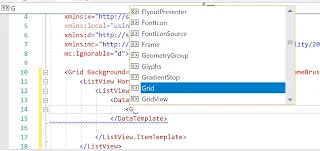
Now we place a Grid, layout element, again using intellisense.
JlistView_8.png


No comments:
Post a Comment