Monday, December 31, 2018
Thursday, December 06, 2018
Bringing JSON data into PowerBI
JSON data source were recently added to Power BI Data sources.
{
I have taken this JSON file from the following site;
and I will be using in this post.
Here is an abbreviated JSON file (with *.json extension) I am using.
--------------------------------------
{
"data": [
{
"name": "Garrett Winters",
"designation": "Accountant",
"salary": "$170,750",
"joining_date": "2011/07/25",
"office": "Tokyo",
"extension": "8422"
},
{
"name": "Brielle Williamson",
"designation": "Integration Specialist",
"salary": "$372,000",
"joining_date": "2012/12/02",
"office": "New York",
"extension": "4804"
},
,
,
{
"name": "Quinn Flynn",
"designation": "Support Lead",
"salary": "$342,000",
"joining_date": "2013/03/03",
"office": "Edinburgh",
"extension": "9497"
}
]
}
-----------
Note that each Json element has six attributes.
Step 1:
You first need to save it to a location of your choice. You could also have it on an URL, but here it is assumed to be in one of the folders.
Launch PowerBI; Click GetData; Click More...
Click JSON
You need to browse and locate your JSON file (it will have a.json extension).
My Koding.json file is now in Data View as shown.
I go back to Edit Queries as I did not edit earlier.
Now I have a query as shown in the left pane.
I had 15 elements in the JSOn file and they have become 16 records after getting it into PowerBI. Now go back to query using Edit Query as before. Now you see an extra control in Column 1 for splitting into its components.
I click the split control. The Query now appears as shown.
Now I convert this into table as shown above. Now what I see in DataView is the following:
The six elements are resolved into six fields as shown above. We will use this later. Click File | Save to save this file in the .pbix format. Presently it has the JSON data only.
That is all folks!
Sunday, December 02, 2018
Bring XML Data into PowerBI
Here is how to do it.
Launch PowerBI. Click Get Data.
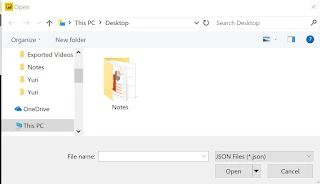
Click XML. Open dialog is displayed. Previously I saved a CD.XML file from W3C site here.
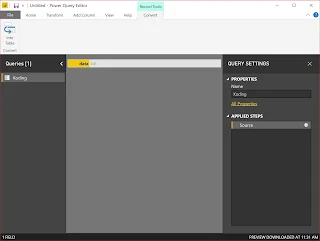
I highlight CD.xml and click Open. Power BI processes my input, and brings up the CD.xml in the Navigator as shown.
I place a check mark for CD.XML. The file loads into the Navigator.
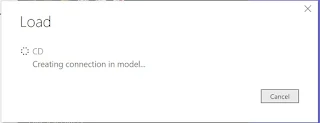
I click Load. My action Load gets processed.
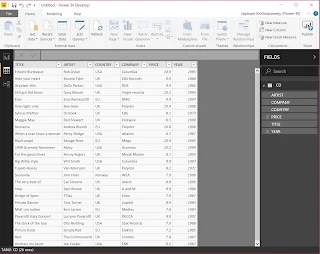
Now CD.XML is loaded into PowerBI. I still don't see it.
Change it to DataView on the Left. Now you see the data in CD.xml.
That's all folks. Now you can do what you want to do in PowerBI.
Friday, November 30, 2018
Bring TEXT/CSV file data inot PowerBI
It is quite easy as long as you have a good Text/CSV file.
I have previously used this file FFD.txt in earlier posts.
I am going to use the same file in this post.
Launch PowerBI and Click GetData.
Click Text/CSV submenu item. This brings up an 'Open' window as shown which lets you search through your folder system.
Locate the FFD.txt file on your drive and click Open. The file is displayed in the PowerUI as shown.
Click Load at the bottom of the above.
The data gets loaded as shown.
Now click on Data in the left as shown and the data is displayed.
This is all folks. It is quite easy to bring in Text/CSV data into PowerBI
Thursday, November 29, 2018
Restoring a legacy database to SQL Server 2017
Northwind database is a legacy database from earlier times and this post shows it can be restored to the latest SQL Server.
The short answer is, Yes.
Azure Data Studio (ADS) is a cross-platform database management tool for managing SQL Servers and it was previously named SQL Operations Studio.
If you do not know what Azure Data Studio, Please review this.
If you want to install Azure Data Studio, Please review this.
In what follows, just follow the indicated steps after launching Azure Data Studio. As a preparation you need to:
- Connect to SQL Server 2017 from within ADS
- Have in hand the backup file (*.bak)
- Make sure you place the above in the Public folder
I am connected to SQL Server 2017 which is installed on my desktop (laptop). It is a default installation as described in the links above.
After I launch ADS and connecting to SQL Server 2017 (default instance), this is what I see. I have no User Database. You are seeing only the System Databases,
I click on the Restore in Tasks and the following page opens. I am restoring from a File and use the handle for Restore from and change it to file and then browse for the backup file which is in my case,
Northwnd.bak.
I browse my computer for the legacy database file (Northwind.bak) and browse to its location in the Public folder as shown.
The rest of the fields you can accept the defaults unless you want to change, as shown. As soon as you indicate the file, it gets displayed as shown.
Click Restore and it gets restored. You see it in the ADS user interface as shown.
Before Restore
After the restore operation
It took ridiculously three steps to restore.
You can verify it in SSMS version 17.9.1
You need to Restore before you see the new object in Object Explorer.
Subscribe to:
Comments (Atom)


