Tuesday, February 28, 2017

Get SQL Server 2016 SP1 before you construct WWI

Getting the SQL Server 2016 SP1:

 I wanted to construct the Wide World Imports database on SQL Server 2016 and found that SP1 is a requirement. Hence, I needed to first apply SP1 to the existing instance.

Go to this link, select the language and click Download

The file name is ENU\SQLServer2016SP1-KB3182545-x64-ENU.exe (551.8 MB).
This SP1 contains SQL Server 2016 RTM Cumulative update 3(CU3).

The supported OS are:
Windows 10 , Windows 8, Windows 8.1, Windows Server 2012, Windows Server 2012 R2, Windows Server 2016

  For complete system requirements, please reference the detailed Systems Requirements page
        6 GB of available hard disk space for the Service Pack update, 10 GB for a Slipstream installation
        Service Pack 1 can be applied to any of the following Microsoft SQL Server 2016 editions:

            Microsoft SQL Server 2016 Enterprise
            Microsoft SQL Server 2016 Developer
            Microsoft SQL Server 2016 Standard
            Microsoft SQL Server 2016 Web
            Microsoft SQL Server 2016 Express

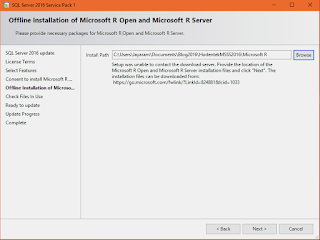
Run (as Administrator) the downloaded file. In the beginning I had some problem and ran the compatibility program. Here are some of the screen shots. It tool quite a while with the R Service related step and the final updating step, otherwise it was without any trouble.


About in SSMS 2016
Microsoft SQL Server Management Studio                        13.0.15600.2
Microsoft Analysis Services Client Tools                           13.0.1605.86
Microsoft Data Access Components (MDAC)                   10.0.14986.1000
Microsoft MSXML                                                              3.0 6.0
Microsoft Internet Explorer                                                 9.11.14986.0
Microsoft .NET Framework                                                4.0.30319.42000
Operating System                                                                6.3.14986
----------------------------------------------

Saturday, February 25, 2017

Multiple problems with Microsoft Edge

Presently the OS version  on my computer is as shown:


Recently I reported that Google sites were unreachable using Microsoft Edge. Now I cannot even bring up Microsoft Edge. Double clicking or, trying to open using right-click on the shortcut does not open Microsoft Edge. Cortana also does not respond. Search box is inactive. Also Windows Start is completely broken. I have to rely on Mozilla Firefox to do anything on the Internet including this post.

One of the suggested remedies on the Internet is to delete this item from your computer and restart:
C:\Users\<user>\AppData\Local\Packages\Microsoft.MicrosoftEdge_8wekyb3d8bbwe

It has worked in the past but this times I am unable to delete this item as there are files being used(?).

Here are the contents of this folder on my computer:


 Probably I will recover using an earlier date.

Friday, February 24, 2017

Introducing Wide World Importers - the new sample database from Microsoft

There have been a number of sample databases that debuted with various SQL Server versions starting from pubs, Northwind, Foodmart and AdventureWorks

Northwind employees have been in the limelight for years and it is time for them to retire. Some 9 employees managed the whole business and now businesses have gone global and IOT and robots are standing in queue.

In this background Microsoft has introduced the Wide World Importers, WWI for short. You can get an overview here , or read on.

This is how Microsoft describes WWI's business:

"Wide World Importers (WWI) is a wholesale novelty goods importer and distributor operating from the San Francisco bay area.

As a wholesaler, WWI’s customers are mostly companies who resell to individuals. WWI sells to retail customers across the United States including specialty stores, supermarkets, computing stores, tourist attraction shops, and some individuals. WWI also sells to other wholesalers via a network of agents who promote the products on WWI’s behalf. While all of WWI’s customers are currently based in the United States, the company is intending to push for expansion into other countries.

WWI buys goods from suppliers including novelty and toy manufacturers, and other novelty wholesalers. They stock the goods in their WWI warehouse and reorder from suppliers as needed to fulfill customer orders. They also purchase large volumes of packaging materials, and sell these in smaller quantities as a convenience for the customers.

Recently WWI started to sell a variety of edible novelties such as chilli chocolates. The company previously did not have to handle chilled items. Now, to meet food handling requirements, they must monitor the temperature in their chiller room and any of their trucks that have chiller sections."

In an importing and redistributing business the Workflow is very well defined to address all exigencies and so it is with WWI as charted by Microsoft:

Workflow of stocks:

    WWI creates purchase orders and submits the orders to the suppliers.
    Suppliers send the items, WWI receives them and stocks them in their warehouse.
    Customers order items from WWI
    WWI fills the customer order with stock items in the warehouse, and when they do not have sufficient stock, they order the additional stock from the suppliers.
    Some customers do not want to wait for items that are not in stock. If they order say five different stock items, and four are available, they want to receive the four items and backorder the remaining item. The item would them be sent later in a separate shipment.
    WWI invoices customers for the stock items, typically by converting the order to an invoice.
    Customers might order items that are not in stock. These items are backordered.
    WWI delivers stock items to customers either via their own delivery vans, or via other couriers or freight methods.
    Customers pay invoices to WWI.
    Periodically, WWI pays suppliers for items that were on purchase orders. This is often sometime after they have received the goods.

You will be hearing more about WWI in my blogs:
http://hodentek.blogspot.com
http://hodentekMSSS.blogspot.com
http://hodentekHelp.blogspot.com

Thursday, February 23, 2017

Azure SQL Database is to be fortified againt cyber threats

This cyber security will be coming soon in April 2017 offering protection from threats in addition to more sophisticated search capabilities. If you are using Azure DocumentDB then you are compliant with the latest security measures.

Securing Azure SQL Database takes just a few minutes and requires no expert knowledge of how it is done. The feature learns profiling and discovering anomalous activities and probably with built-in AI.

This is likely to cost an extra $15/month/server according to this site here .

Read here for more.
Read some more here.

Wednesday, February 22, 2017

Microsoft goes after automakers

Of course it is Microsoft Azure Cloud Services that offers the platform for global automakers.

Here is the list who have signed up with Microsoft:
Renault-Nissan
Toyota
Ford

Most recently Tata Motors of India has inked the collaboration. According to Microsoft's guy in Mumbai they envisage 90% of new cars will be connected in the 2 to 3 years.

Microsoft offers:
IoT
AI
ML (Machine learning)
Global Cloud Management


What's in the offing regarding Tata Motors?

First auto with enhancements vis-a-vis Microsoft will be showcased at the 87th Geneva International Motor show.

Read more details here:
http://www.bsmotoring.com/news/tata-motors-logs-into-microsoft-to-improve-in-car-connected-experience/15303

Monday, February 20, 2017

Build Interactive web apps with the statistics focused R language

You started learning the Statistics/Analysis focused language R and you want to do more. You want to build apps with it and host them on the Internet. All this is possible using Shiny.

It is an enterprise-grade web application framework targeted for those who want to develop with R using the familiar HTML5, CSS and JavaScript. Using R you can turn terrific analytic solutions you have developed/developing into interactive web applications.

Go to this site (https://shiny.rstudio.com/) directly and learn more.

 
Rshiny-00

If you have R Studio you have Shiny because Shiny is a package that you can download.

In this first part we only talk about the very basics.

I assume you have read my previous hands-on R examples in my blogs.

http://hodentekhelp.blogspot.com/2015/09/what-is-good-way-to-learn-r-language.html
http://hodentekhelp.blogspot.com/search?q=R+language

Here I just show a very basic (aka Hello World) example of creating content for a web page using R GUI. More will come later in my blogs.

Launch R Gui as shown and provide reference to the shiny "library" as shown by typing in the three lines of code (The four lines of code in red).


 HelloWorld_00

When you hit Enter after the third line where you define the shiny app, a browser window will open as shown displaying the apps output as shown at a port of the local host.


HelloWorld_01

You also get a response (the last line) in the R GUI as shown.


HelloWorld_02
That is all there is to create a content.

The ui summarizes your user interface, the server is something like a web serve rand shinyApp is your web response. No fuss, very simple.

Saturday, February 18, 2017

Iris(Beta) Recognition on Windows Phone Microsoft Lumia 950

Windows 10 uses bio-metric signature of an individual as a security feature of a Windows 10 device, be it a Windows Phone or a Windows tablet/PC. Windows Hello makes this possible in Lumia 950 (OS Build: 10.0.1.14965.1001) with an iris scanner. It can also be of two other types and some devices may have more than one type. As an alternative the device should also have the option of other non-bio-metric of authentication such as a pin or a username/password pair.

Lumia 950, the Windows 10 phone has an iris scanner built-in to the camera that compares an individual's iris image to the one that it stored during the initial set up and the phone is unlocked when there is match. if not, the phone asks for the pin number to be punched in to unlock.

The other Windows Hello options are finger print recognition and facial recognition.

In what follows I show some of the screen shots for setting this up on a Lumia 950 Phone. Not all types of Windows Phone has this feature.

First of all this is a high resolution photograph of a human iris from an UK site here.
It is easy to believe the iris signature is far superior to finger print if the camera is good.


Setting up Iris Recognition:

Yous start with Settings on your Lumia Phone after setting up a pin to login. In Settings look for Personalization.


Lumia950_00.png

Go down the list and click Lock Screen to open the Lock Screen Page as shown.


Lumia950_01.png

 At the very bottom you find Sign-in options. Click this link. The Sign-in options page opens as shown.

Lumia950_02.png

There is link if you want to know more about Windows Hello. But there is a Iris(Beta) Set up button. Click the button.
You get a Welcome to Windows Hello page. You can not only unlock your phone without complex passwords but you can buy stuff from Windows Store.

Lumia950_03.png

Click on Get Started. The Camera becomes active and you will be asked to move closer or farther (as the case may be) so that the camera can take its standard image of your eye as shown here.

Lumia950_04.png

You will be asked to hold your phone in front of your eyes (I did open my eyes a little more than wider to make sure he camera got it all) as shown.


Lumia950_05.png

Click Next while you are holding the camera and looking into it.

Your setting up has been successful. You may do it even with your glasses on so that with or without glasses you can unlock your phone.


Lumia950_06.png

It did work quite well. There were a few times it did not and then I had to use my pin. But this is much better.

2/20/2017
Noticed after a while of use:
If you switch the power off from the phone, the first time you start you will have to use your password.


Tuesday, February 14, 2017

Creating Server Code Service in Appery.IO

Appery.IO has a neat visual interface to create a REST API service (endpoint). There are two options for creating  a service. In the first option you can generate REST API automatically for a database table or a Custom REST API. In the former, you will be asked for a connection to a table. At present it appears that connecting to a named instance of SQL Server table is not possible.

In the following post, I describe creating a service endpoint using server side code for a Collection(similar to a table). The same interface can be used for creating service flow with advanced logic to include REST API, SOAP Services, Custom SQL Queries, etc. 

API Express create new project FFD


ApperyIO6_00

Note: I am not sure why there is a textbox below the Create New Project button as the following screen asks for the name of a New Project.

In the New project window enter the name.


ApperyIO6_01


New project is created. Click on SQLData in the project page to open the SQLData page as shown.


 ApperyIO6_02.PNG


Click new service in the screen above.

The New service page opens as shown.


ApperyIO6_03.PNG

Provide a Group name (JanSvc2_14) and choose Custom REST API and click create.


ApperyIO6_04.PNG

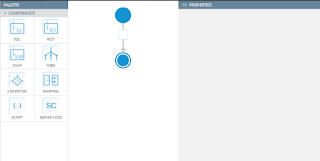
Drag and drop the Server Code (SC) from the PALETTE to the empty box as shown. If you want to remove it you click the red circle with x.


ApperyIO6_05.PNG

In the PROPERTIES -SERVER CODE click the handle and select the only script there -loadGoodsScript. For the Script Query Parameters click on the handle to reveal the following:

ApperyIO6_06.PNG

Choose BODY.

For SCRIPT BODY place check mark for Use previous component and click Generate.


ApperyIO6_07.png

Click Generate. Generate Service Response window opens.


ApperyIO6_08.PNG

Click Run Server Code API.

The code is run and the result is displayed as shown.


ApperyIO6_09.PNG

Click Import Response.


The Response is now in the visual designer.

ApperyIO6_10.PNG

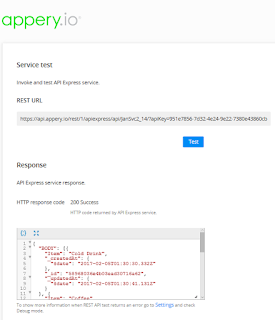
Now you can test the API. Click TEST in the menu. The Service Test page is opened displaying the endpoint and a Test button as shown.


ApperyIO6_11.PNG

Click Test.
The Test succeeds otherwise there would be an error which you can debug by going to the Settings.

ApperyIO6_12.PNG

Copy the endpoint in the above and paste it to the address of a browser and you should see this.


Now you have a endpoint to work with.


Microsoft Edge with recent Windows 10 upgrade cannot access Gmail

Last night (2/12/2017) there was a Windows 10  Upgrade and I am  receiving neither Gmail nor my blogger.

I think it is related to the upgrade as I can get gmail on my phone (Lumia 950 and iPhone6), on my TOR and Firefox browsers.

Windows 10 Insider Preview 14986  --Cannot access Gmail
Lumia 950: Phone OS Build: 10.0.14965.1001--Can access Gmail

It is 10:58 PM 2/13/2017 and still I have not access to Gmail or blogger on my Microsoft Edge.
It is  4:30 PM on 2/25/2017 Encounter multiple problems with Microsoft Edge. It is completely broken.

jQuery based mobile app with back-end data using Appery.io

Apps without data are not very useful and for Enterprise mobile apps it is a must. Appery.io provides a platform to build apps with ease. Integrating with back-end data is as easy.

The example in this post is the same as the example at Appery.IO site although some names are different. You may find more details (screen shots) here than at the Appery.io site.

Here are steps to create apps which takes in data from the database.

Creating the App
Designing the APP UI
Import the Server Code script
 

Mapping the Service to the UI
Invoking the Service
Testing the app 

Go to Apps on Appery.io platform. Create a new App called Bigbox.

 
ApperyIO5_00

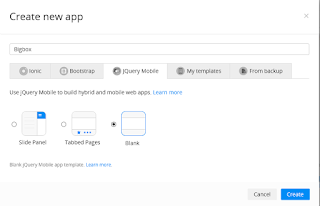
Choose new blank template using jQuery Mobile in Create new app window.


ApperyIO5_01.PNG

Bigbox project page opens.
-------------

Designing the APP UI

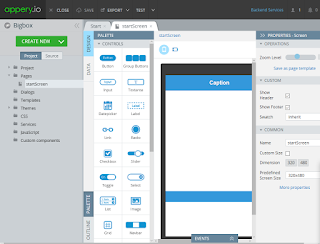
Click Open Pages and click on startScreen.

 
ApperyIO5_03.PNG

The startScreen header is now reading Caption, the same in the Properties -Header window as shown.


ApperyIO5_04.PNG

Change Caption to My App in the Proprieties - Header. The startScreen header also changes.

Drag and drop List from the PALETTE to the startScreen which now appears as shown.


ApperyIO5_05.PNG

As seen above, the List component comes with 3 list items. Since the database is loaded to the list item, you need only one list item and the other two are not needed.

In the bread-crumb of UI above click on mobilecontainer


In the Properties - List shown here.


ApperyIO5_06.PNG

Change Items from 3 to 1 and click Apply. Now two of the Link items disappears from the startScreen.

You can also remove the icon for the List. Click on Buttons Icon and choose No Icon

ApperyIO5_07.PNG

Now the &gt; icon is gone.

With this the UI is done.
The final design of UI is as shown.

ApperyIO5_08.PNG
------------------------
Import the Server Code script


Click Create New &gt; Back-end Services &gt; Server Code Service


ApperyIO5_09.PNG

Choose your script in the Import Server Code service as shown.


ApperyIO5_10.PNG

Click Import selected services.

The Services node in the Project folders gets the loaded service.


ApperyIO5_11.png

Click Test link on the left in the tabbed page loadGoodsScript_service.


ApperyIO5_12.png

Click Test button far right in the Response pane.

The Response pane gets populated with data from the back-end database as shown.


ApperyIO5_13.png

The above is the JSON response from the database replying to your request. Now port this response to your app by clicking Import as Response button.

You have successfully created the Service response.


ApperyIO5_14.png
---------------------------------
Mapping the Service to the UI:
This step involves associating the database items to the UI elements.

Go to startScreen and click  open the Data view.


ApperyIO5_15.png

Choose Service in the first drop-down box, the second automatically changes as shown.


ApperyIO5_16.png

Click Add and the UI changes as shown.


ApperyIO5_17.png
The Before Send events are not relevant and you can remove the Mapping button for the Before Send event.

For the Success event click the Mapping button.  Mapping items from Service to the App is opened as shown.


ApperyIO5_18.PNG

Map the items as shown by joining the items shown with your mouse.

ApperyIO5_19.PNG

Click Save and return at the right hand side of Mapping Editor.

The Data now looks like this.


ApperyIO5_20.PNG

Invoking the Service


Click DESIGN to open the Design View

Select startScreen in page bread crumbs

Open Events tab


ApperyIO5_21.PNG

For the EVENT choose Page show from this drop-down list.


ApperyIO5_22.PNG

For the ACTION choose Invoke service


ApperyIO5_23.PNG

Click Save.

Testing the app

Click Test at the top.

App gets launched as shown


ApperyIO5_24.PNG

In the Apps page you can see the details of this app.


ApperyIO5_25.PNG

That is all folks!

.
DMCA.com Protection Status